
The “Affiliates” tab is where you set options that will affect:
- Your affiliates’ registration type and fields
- The “welcome” page
- Fraud prevention.
Registration Type

Public – When this option is set to “Public” anyone will be able to signup and automatically become an affiliate.
Please note that if you select the Offline payment method as a way of paying your affiliates, the PayPal Email field on the registration page will not be shown.
Private – When this option is set to “Private” the only way an affiliate can register is he or she is added by an administrator manually. See How to Manually add an Affiliate in WordPress.
Application – When this option is set to “Application”, a prospect will have to fill out an affiliate application before they can become an affiliate. You, the administrator, will have to approve each application before the person can become an affiliate. When this is selected new fields will appear (see image below).
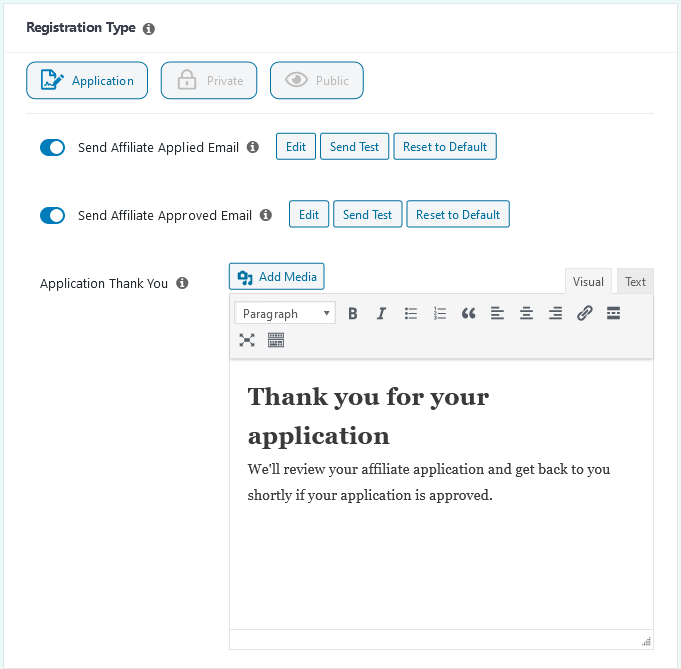
Use the sliders to turn each email on or off.

Choose “Edit” on either of the email options to expand and then edit the selected email.
Send Affiliate Applied Email – This is the email that goes out to your site’s admins to inform you of all the information regarding a newly applied affiliate
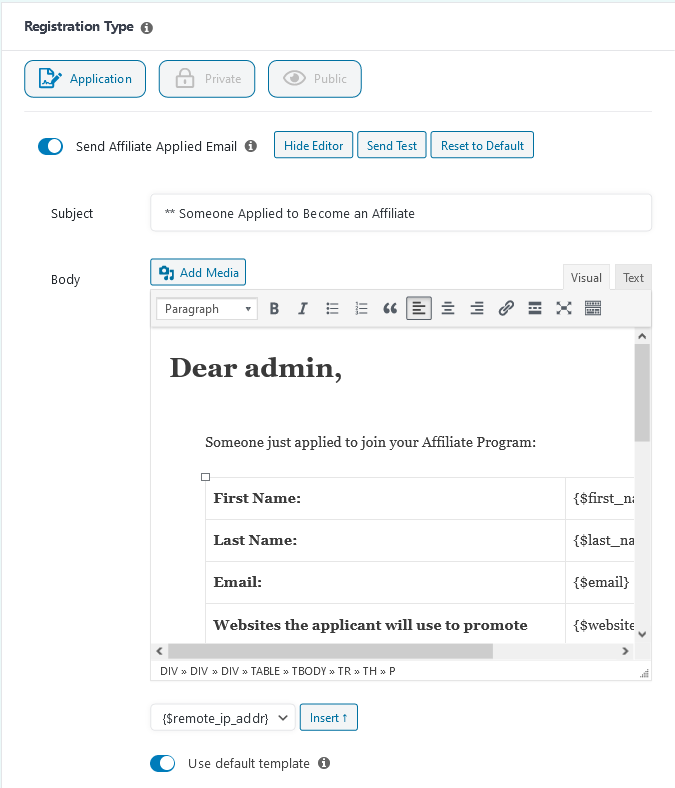
Send Affiliate Approved Email – This is the email that is sent out to the applicant informing them of their approval.
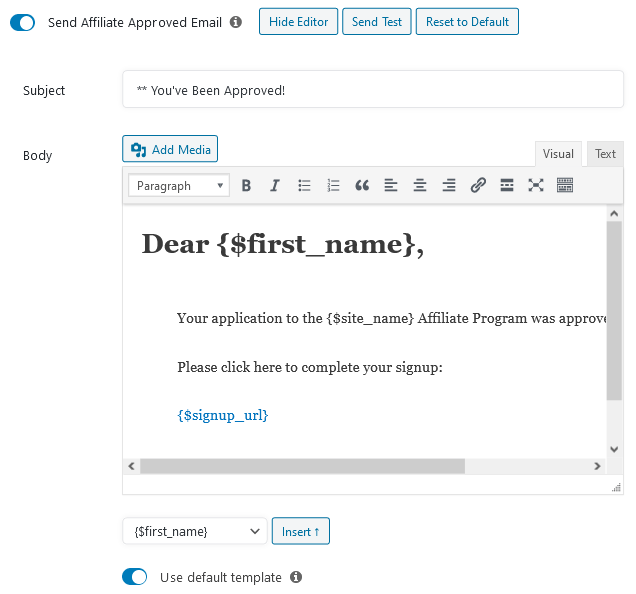
(A full list of email parameters can be found here: Email Parameters-Full List)
Send Test – This will send a test email to the email you have set as your admin email (note: this is used to simply verify if the email is being sent and received; it will not contain any real or custom information)
Reset to Default – This will remove any custom parameters, images and settings you have added, and will set it to the default email.
Application Thank You – This will be the HTML that will be shown to the Affiliate applicant after they submit an application.
See How to Manage Affiliate Application Requests for more information.
Form Fields
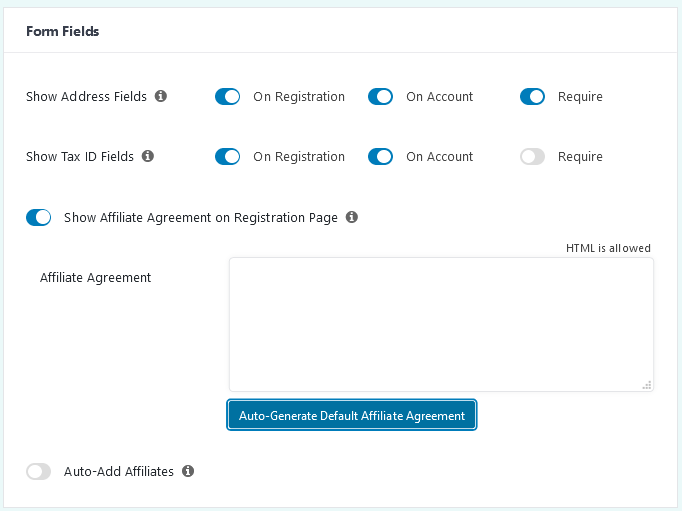
Show Address Fields – Select if you want to collect address fields from your affiliates. You can select to:
- Get the information at the time of registration
- Whether you want it shown on the affiliate’s account page
- Whether it is a required field, meaning affiliates can’t register without filling out the information
Show Tax ID Fields – Select if you want to collect Tax ID fields from your affiliates. You can select to:
- Get the information at the time of registration
- Whether you want it shown on their account page
- Whether it is a required field, meaning an affiliate can’t register without filling out the information.
Show Affiliate Agreement on Registration Page – If selected, you’ll see the “Affiliate Agreement” box appear. Here you can either write whatever you want, place some pre-formatted HTML, or choose the “Auto-Generate Default Affiliate Agreement” button to have it created for you.
Auto-Generate Default Affiliate Agreement – Selecting this button will trigger a pop-up where you’ll need to fill out some basic information.
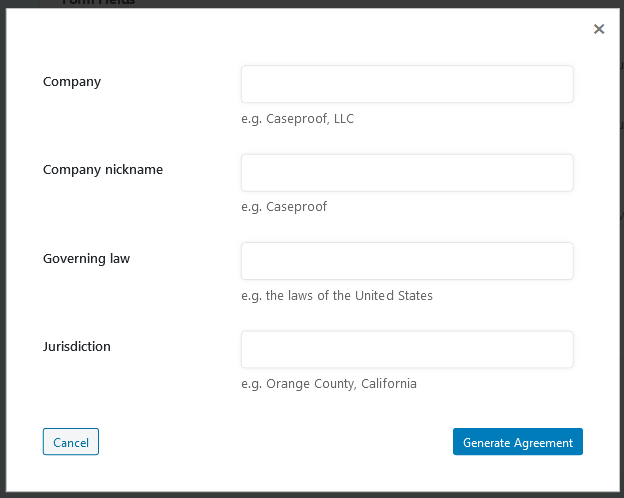
Company – Your legal company name
Company Nickname – The name you usually call your company
Governing Law – The law within which your company abides
Jurisdiction – The region-specific laws that apply to your company
Select the “Generate Agreement” button to have it auto fill the Affiliate Agreement field with a pre written agreement that now has your information
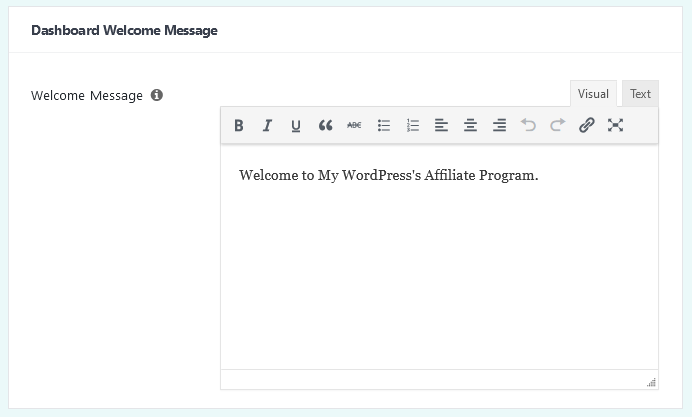
Dashboard Welcome Message
This is the customized message your affiliates will see on their Affiliate Dashboard welcome page.
Fraud Prevention
For information on Fraud Prevention and setup, read more here
